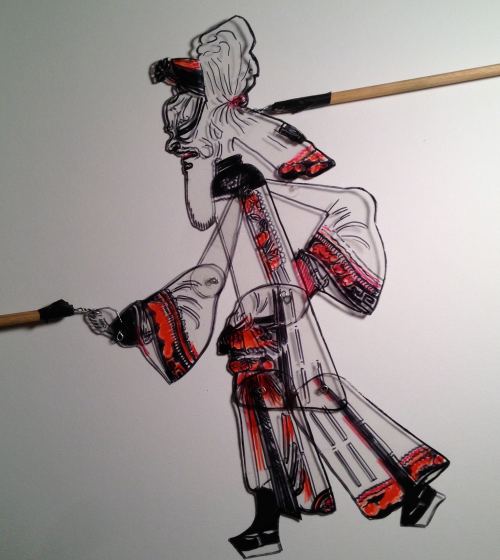
In February, I got to visit the Virginia Museum of Fine Arts to present a demonstration/workshop combo to a huge number of visitors to their ‘China Day’ festivities. The development team and I talked quite a bit about how to handle such a large number of audience members in a very short amount of time. I ended up developing some simplified colored, plastic Chinese-style shadow puppets that are simplified (only 2 rods and 6 joints) from the original Chinese shadow puppet design (3 rods and 9/10 joints).
This simplified design helps kids and beginners start manipulating the puppets better, sooner – without sacrificing much of the puppet’s agility. And, they’re sturdy enough to hold up to hundreds of kids doing their worst and enchant them with awe at the same time. Win, win.
*Though some of the steps in the process can be fussy, it’s worth the effort. Please message me if you need additional clarity and I can edit as necessary. Of course, feel free to modify the materials and joints/etc however you see fit – “there’s many ways to skin a cat” as they say.
Tools & Materials
- Your design in color/Color print out of traditional shadow puppet *For Chinese shadow puppet pics, click here: www.chineseshadowpuppetry.com (and go to the aesthetic tab – all photos can be downloaded)
- Dura-lar, acetate or other clear plastic sheeting (.030-.040” thick) *(you’ll need about a 8.5×11” area for one 12” puppet)
- A Black Permanent Marker
- Colored Permanent Markers
- A sharp scissors
- 16 – 20 Gauge Wire (about 1’ per puppet)
- Wire snips
- Needle Nosed Plier
- An Awl or Needle Tool
- 1/8” Wooden Rods (12”-16”long) or Chopsticks
- Duct/Gaff Tape (6”)
Begin by printing your design onto paper. (You can browse through any of the pictures in the slideshow here and download your favorite one.)
Once you pick your favorite shadow puppet template, you will be tracing/coloring and cutting out the following pieces (as illustrated in the picture below):
- Head and torso, plus one full arm
- One upper arm piece
- One lower arm piece
- One hand
- One hip piece
- One front leg with foot
- One back leg with foot
Lay this design under your piece of dura-lar plastic and tape to secure if needed. Keep in mind that you’ll be cutting out separate pieces of the design, so to maximize your plastic, push them as close together and to the edge as possible – like when you cut cookies out of rolled dough.
I start out tracing the outline in black marker, then filling out the colored patterns within the piece and going over the entire piece with black marker outlining. Of course, expriment and find which way works best for you.
After you’ve traced all your pieces and colored them in, simply cut them out with a sharp scissors.
Here comes the hard part: putting those pieces together!
Line your pieces up where they should be joined together and make a hole through both pieces with your awl or needlepoint tool.
Looking at some of the finished designs, you can get a sense of where to place these joints (hint: they’re placed almost exactly where they are on the human body – i.e. shoulder, elbow, knee.) This will give you a good approximation of where to start, but know that you might get it wrong the first time and have to try a few more holes. You’ll know the holes are in the wrong place if the puppet, at rest, hangs at an awkward angle. The more you do it, the better you’ll get at it.
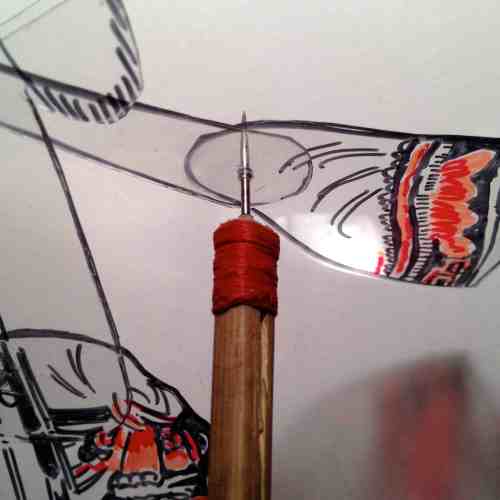
Once you’ve made the joints in the correct place, now it’s time to make your wire joints. Cut a piece of wire about 1” long (step 1). Make a small circle, the size of your needle-nosed pliers, on one end and flatten it, perpendicular to the rest of the piece (step 2).
Push the straight end of the wire through the joint hole.
With the straight end on the other side, make another circle and press flat (step 3). Repeat as needed! (If these joints don’t move freely, loosen the two circle ends away from the plastic joints. Play with it until it hands just right.)
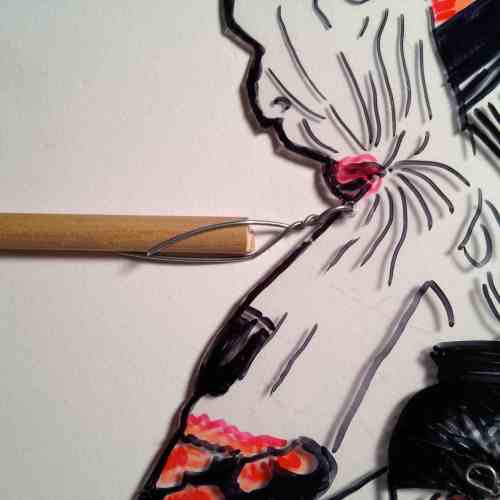
Once your puppet is fully jointed together, you’ll want to attach control rods for your hands to be able to manipulate the puppet. These are usually placed (one) at thefront or back of the neck and (one) on the free hand. (See below)
For your two control rod wires, cut a wire piece about 4” long (step 1). Make a hole on the top part of the hand (where indicated) and at the back or front of the neck. In the middle of the 4” piece of wire, make a perfect circle with your needle-nosed pliers about 1/8”–1/4” in diameter (step 2).
Slide one through each hold: neck and hand.
Once through, pinch and twist the excess wire into a tight spiral.
Tape that excess to your rod using very tacky tape (duct, gaff, etc). If your tape is 2-3” wide, rip it in half lengthwise.
Now, you’re ready to start puppeting!
*Check the http://www.chineseshadowpuppetry.com’s DIY page to figure out screen and lighting options
Thanks for reading~


